Why choose a lean-to style?
A lean-to style greenhouse is one that is built against a wall. The benefits of this are many:
- The wall retains heat keeping the greenhouse warmer for a longer time into the night.
- A greenhouse attached to a wall will be stronger than a freestanding one.
- A permanent set of wires can be fixed to the wall to allow plants to be tied in.
- Aesthetically, a wall in a greenhouse gives a sense of privacy and solidity
- When the wall is constructed from brick it can be very attractive.
You can see examples of such structures in the magnificent greenhouses of Victorian and Edwardian kitchen gardens. I am most familiar with the ones at West Dean Gardens which have been restored magnificently to working order. These great greenhouses had a big influence on my far more modest design ideas. I knew I couldn’t compete with them in terms of scale or authenticity but I could take some of the design cues and make them work for me.
Aluminium or timber?
The two obvious choices for constructing the greenhouse are aluminium and wood. Aluminium is long-lasting, low maintenance, and because the struts are so thin, lets in a maximum amount of light. However, it is a poor insulator, and to my mind always looks insubstantial, even ugly. There are exceptions; if money is no problem, then you can get an Alitex greenhouse. They replicate traditional Victorian timber greenhouses using cast aluminium and they look fantastic. Their strap line is “Aluminium made beautiful” which it certainly is, but when you see the cost you will need to go and sit down. Or sell the Jag.
So, aluminium is out. What about wood? Wood is warm, tactile, substantial, sustainable. I like wood. But it is far less durable than aluminium, and if you choose badly, it can be high maintenance or even simply rot in a couple of years. The most common durable greenhouse is cedar (western red cedar). It contains natural preservatives that mean it is virtually immune to fungal decay or insect attack. It knocks spots off even the best pressure impregnated softwoods. So cedar it has to be!
What kind of base?
As well as protection from water, timber needs protection from the soil born microorganisms (mainly fungi) that cause decay. So, whilst all timber lasts longer if it is raised above ground level, even timber close to the ground will eventually rot because rain water splashes soil on to it carrying the decay organisms on to the wood. Hence, to protect the cedar it should ideally be at least a foot or more above the ground. This was the main reason I wanted a brick base for my greenhouse, to keep the wood clear of rain splashes.
When I started researching greenhouses it became clear that the standard ‘dwarf wall’ style is not very dwarf at all, standing about 70cm high, half way to the eaves. Manufacturers, I realised, simply leave off the bottom panel of the greenhouse (see fig 2).

Fig. 1: The standard glass-to-ground configuration provides the maximum light, but has several weaknesses. Firstly, and as already stated, decay is more likely with the timber so close to soil level. Secondly, the lower panes are prone to soiling and algae build up. Thirdly, the lower panes are prone to impact from spades or feet when working near them. Finally, there is minimal insulation.
Fig. 2: In the standard dwarf wall configuration the entire bottom pane is lost, and the structure sits atop a dwarf brick wall, about 70 to 80cm high. This increases the insulation value of the greenhouse, but considerably decreases light entering. This basically rules out growing anything at ground level. Consequently greenhouses like this are usually used with staging (work benches) all the way round, and little is ever grown below this height.
Fig.3: My solution was to raise the entire greenhouse up about 35cm on a much lower dwarf wall. This maximizes light, whilst protecting the structure from ground contact and rain splashes. It affords physical impact protection at low-level, and increases insulation. It does, of course, increase the cost as the ends of the greenhouse have to be modified. This is a relatively minor adjustment and did not add too much to the final bill – certainly this modification was considerably cheaper than a full bespoke design.
Greenhouse style and rear wall
OK, so far so good, but I wanted a lean-to style – one with a brick wall running along one side. Current planning laws only allow a boundary wall between properties to be 2m high. Any higher and you’ll need planning permission. As my wall was to replace three fence panels which were themselves 2m high I needed a greenhouse design that would work with a wall of this height. Initially I had imagined a lean-to, but this was not as straightforward as I imagined. Lean-to greenhouses (fig. 6) are designed to go against the side of a house or other tall wall, which need to be at least 2.5m high – so that was out. My second idea was the vinehouse (fig. 5) as this can be erected against a wall as low as 1.95m. This seemed ideal, until I started considering the dwarf wall. If I wanted to add a dwarf wall as per fig. 3 above and jack up the main structure than the wall would be higher than 2m and hence need planning permission.
 [Diagrams modified from Gabriel Ash; (c) Gabriel Ash 2010]
Finally I turned my attention to the standard greenhouse design (fig. 6). With an eaves height of 1.55m I could jack the main frame up 0.38m (five courses of bricks), and still be within the 2m height restriction for a boundary wall. So that’s what I did.
Door Options
I decided on traditional swing doors, rather than the standard sliding doors (shown in fig 4 – 6), mainly for aesthetic reasons. As I have said, I wanted to capture some of the feel of the great Victorian greenhouses, and only a traditional swing door will do that. This is, however, a case of style over practicality. The down side of swing doors is that they can get caught by the wind and smashed about if you do not secure them. Sliding doors do not suffer from this. Also, sliding doors can be left ajar just as much as necessary for ventilation, but swing doors are either open or closed (although I intend to install brass hooks to latch them ajar). Having considered all of these options I couldn’t bring myself to specify sliding doors – they are just too ugly. For example, the top track always sticks out beyond the roof line (see fig 4-6) . I have not regretted the decision since.
Painted or natural cedar?
Cedar is often left unpainted. Its initial reddish hues look fresh and inviting, and it seems almost sacrilegious to even consider applying paint to it when it stands before you all freshly and new. However, like all wood the sun will gradually bleach it no matter what you do, and it will change in time to the standard silver-grey of all old wood. True, it will lose almost none of its famous durability but after a couple of years it won’t look half as smart as it did to start with.
For me, there were additional reasons for painting:
- To borrow from that traditional Victorian vernacular.
- To match the black and white styling of our house and other garden buildings.
- To ensure the cedar was protected to the utmost (lets see if we can get a 50+ years lifespan out of it!)
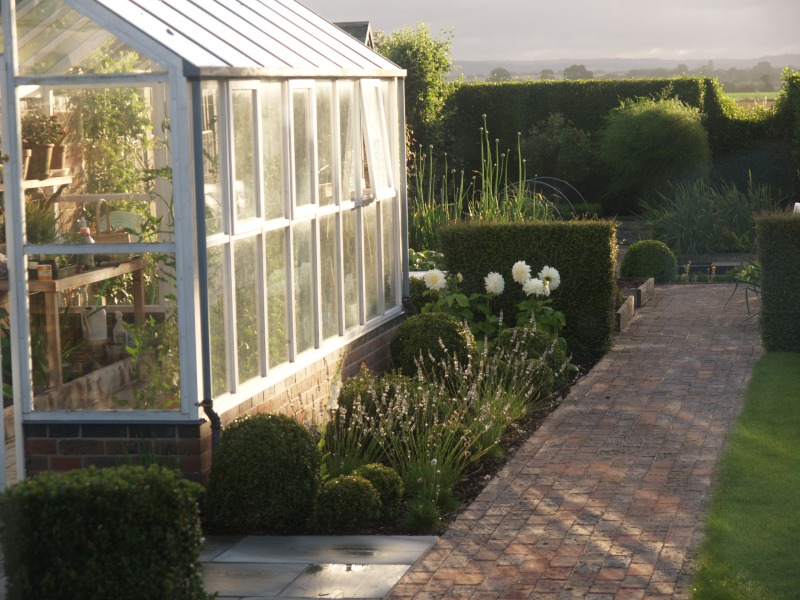
The final design
Here is the final design, and a picture of the greenhouse soon after construction:

Final Thoughts
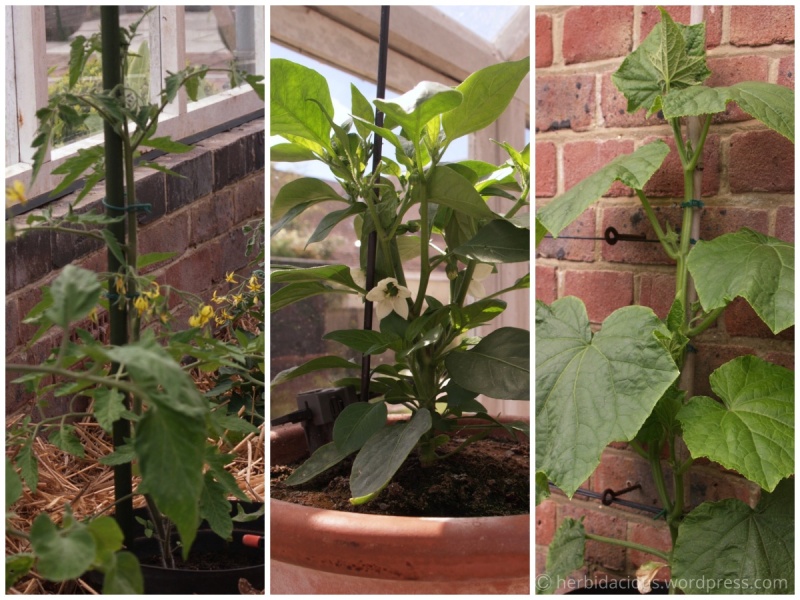
Added benefits with this design are that the eave height is nearly 2m on both sides of the greenhouse, giving plenty of vertical growing space; In the first season I had cucumbers and tomatoes growing to the full height on both sides of the path. That extra height gives a sense of space and stature. My dwarf-dwarf-wall has proved itself an excellent choice, protecting the timber from knocks and splashes whilst letting ample light in to the permanent beds. I am pleased I chose a Gabriel Ash greenhouse – their attention to detail reminds one of how good English engineering can be. They provided an excellent personal service from start to finish, and were always patient, courteous and helpful even though I changed my mind (and the design) several times before finally placing my order.
Related Links
The Greenhouse – (Introduction & Contents page)


 At the bottom the panes rest against a ridge on the aluminium gutter, so water running down gets deposited into the gutter and never comes in contact with timber (right).


